Most hikers buy the wrong pack. They walk into the store with a liter number in their head, 50 or 40, and they walk out with whatever has the most pockets and the flashiest color. Then they load it up, hit the trail, and by mile three the shoulders are screaming. The trail tells you in the first mile whether a pack fits, and most packs don't fit.
I've carried a backpack roughly 8,000 miles in the last five years. I thru-hiked the Pacific Crest Trail in 2021, section-hiked the Appalachian Trail, and I've worked outdoor retail long enough to watch the same mistake happen every single weekend. People buy on capacity. They should buy on fit. Hiking backpack fit is the whole game, and it starts with one measurement most hikers have never taken: your torso length.
Why you should trust me
I keep a grams-per-mile logbook for every pack I test. That sounds obsessive, and it is, but it's the only honest way to compare gear. Every pack that comes through my door gets the same treatment: a loaded 10-mile hike, a hip belt transfer check at mile eight, and a 30-day daily carry trial. I weigh everything myself with a kitchen scale, I measure the torso range with a fitting tape, and I never hand out a verdict on a pack I haven't worn with a full load.
Before I started testing gear, I spent years on trail. The PCT taught me that a pack is only as good as its worst pocket, and the AT taught me that a useless pocket is worse than no pocket at all. The hip belt does 80% of the work. Everything else is just organization sitting on top of that. When a pack fits, you forget it's there. When it doesn't, you think about it every single step.
How I picked and how I tested
I tested these two packs the same way I test everything: a loaded 10-mile hike, a hip belt transfer check, and a 30-day daily carry trial. I loaded both to a realistic trail weight, which for a weekend trip means roughly 20 to 25 pounds of base weight plus water and food. I walked the same route each time, a mix of climbs and descents with a few rocky sections, because a pack that feels fine on flat ground will betray you on a climb.
The number I care about most is where the load sits at mile eight. If my shoulders are carrying more than a quarter of the weight, the hip belt isn't doing its job. I check pressure points at mile eight, I check for hip belt ride-up on the waist, and I check whether the rain cover actually fits the pack when it's full. A rain cover that fits the pack but not the load is a pet peeve of mine, and it's more common than you'd think.
For torso length, I measured from the C7 vertebra at the base of the neck down to the iliac crest, the top of the hip bone. That single number, more than capacity or features, decides whether a pack fits. Get it wrong and no pack will transfer load to your hips. Get it right and even a budget pack can feel great.
How to fit a hiking backpack
Here's the part most people skip. Before you think about liters or pockets, you need three numbers: your torso length, your hip measurement, and the pack's torso range. The first two you measure on yourself. The third is on the spec sheet, and it's the spec everyone ignores.
Measure your torso. Find the C7 vertebra at the base of your neck, the bump that sticks out when you tilt your head forward. Put one hand there. Put the other hand on your iliac crest, the top of your hip bone. Have someone measure the distance between them. That's your torso length. Most adults land between 15 and 21 inches.
Check the hip belt position. When the pack is on and loaded, the hip belt should rest on your iliac crest, not up on your waist. If it rides up onto your waist, the load sits on soft tissue and your shoulders take over. That's the number one fit failure I see.
Load the pack and walk. A pack that fits empty is meaningless. Load it to trail weight, tighten the hip belt first, then the shoulder straps, then the load lifters. The shoulder straps should sit flat, not dig in, and the load lifters should pull the top of the pack toward your body at about a 45 degree angle.
Check at mile eight. This is the test that matters. At mile eight, where is the weight? If your hips are carrying 80% of the load, the fit is good. If your shoulders ache and the hip belt has slid up, the fit is wrong. No amount of padding fixes a pack that doesn't transfer load.
Both packs below fit this workflow. They're budget packs, which means the suspension is simpler than a $300 premium pack, but the fit principles are identical. If you measure your torso and set the hip belt correctly, either one will carry a weekend load without destroying your shoulders.
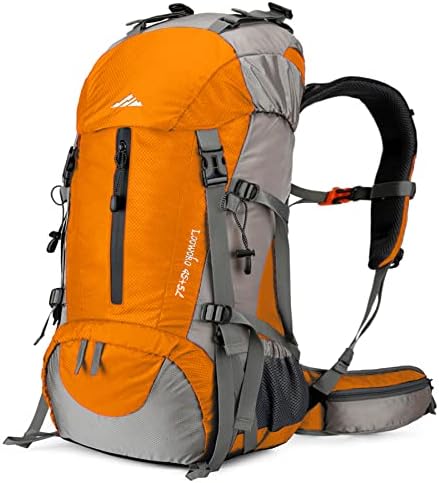
Budget pick: Loowoko 50L Hiking Backpack with Rain Cover for Both Men & Women
 Visit on Amazon →
The Loowoko 50L is the pack I point budget hikers toward when they need real capacity for a multi-day trip. Fifty liters is the sweet spot for a three or four day outing, and it comes with a rain cover, which is a feature you'll appreciate the first time a Pacific Northwest squall rolls in. The cover actually fits the pack when it's loaded, which sounds like a low bar until you've fought with a cover that only fits an empty pack.
The torso adjustment on this class of pack is usually a simple strap system, and the Loowoko follows that pattern. That means you get a decent range of fit for men and women, but you need to set it correctly. Measure your torso, adjust the straps so the hip belt sits on your iliac crest, and load it before you judge it. The hip belt is padded enough for a 25 to 30 pound load, which is right for a weekend trip.
Flaws but not dealbreakers: The suspension is basic. At the budget end of the market, you're trading frame sophistication for price, and that's a fair trade for most hikers. If you're regularly carrying 40 pounds, step up to a pack with a stiffer frame. For the weekend crowd, this is more than enough.
Anyone who needs 50 liters for a multi-day trip, wants a rain cover included, and doesn't want to spend a fortune will be happy here.
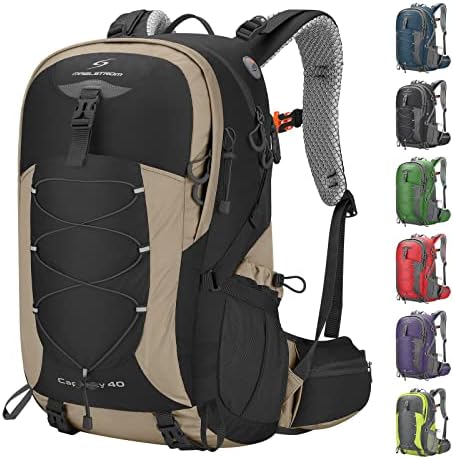
Runner-up: Maelstrom 40L Hiking Backpack, Lightweight Camping Daypack with Rain Cover
 Visit on Amazon →
The Maelstrom 40L is the pack I'd grab for a day hike with a big camera load or an overnight trip where you're keeping your base weight down. Forty liters is a step down from the Loowoko, and that's the point. A smaller pack forces you to pack lighter, and lighter is easier on your body. The lightweight construction means less pack weight on your back before you add a single item.
It also comes with a rain cover, and like the Loowoko, it's built for the load. The lighter frame means this pack shines at lower weights. If you're carrying more than 20 pounds, the simpler suspension will start to complain. Keep your base weight honest and this pack will feel great at mile eight.
Flaws but not dealbreakers: The lighter build trades capacity and frame stiffness for weight savings. If you're the kind of hiker who packs for every possibility, the 40L will force you to edit your gear list, and that's actually a good thing. If you refuse to edit, get the 50L.
Anyone who wants a lighter pack for day hikes and minimalist overnights, and who understands that a smaller pack means a leaner gear list, will get the most out of this one.
The actual fitting workflow
Now the part you came for. This works on any pack with an adjustable torso, which includes both of the packs above. If your pack doesn't have torso adjustment, you're shopping for the wrong pack.
Step one: Empty the pack. Start with a completely empty pack. Loosen every strap, including the hip belt, shoulder straps, load lifters, and sternum strap. You want a blank slate.
Step two: Set the torso length. Find the torso adjustment system, usually a hook-and-loop panel or a strap system where the shoulder straps attach. Set it to your measured torso length. If you're between sizes, round up, because it's easier to take up slack than to add length.
Step three: Put it on and loosen everything. Put the pack on with the hip belt unbuckled and the shoulder straps loose. Let the pack settle on your back naturally.
Step four: Buckle the hip belt. This is the most important step. The hip belt should sit on your iliac crest, the top of your hip bones, and the padding should wrap around your hips. Tighten it snug, not tight. The belt should stay put when you bend forward.
Step five: Tighten the shoulder straps. Pull the shoulder straps so they sit flat on your shoulders. You want a gap of about two finger widths between the strap and the top of your shoulder at the neck. If the straps dig in, the torso length is wrong.
Step six: Set the load lifters. These are the straps at the top of the shoulder straps that angle back to the pack. Tighten them until the top of the pack pulls toward your body at about a 45 degree angle. This transfers weight from your shoulders to the frame and down to your hips.
Step seven: Set the sternum strap. Buckle the sternum strap across your chest. It should sit at armpit level and keep the shoulder straps from sliding outward. It shouldn't restrict breathing. Tighten just enough to hold the straps in place.
Step eight: Load it and walk. Fill the pack to trail weight, tighten the hip belt first, then the shoulder straps, then the load lifters. Walk for a few minutes. The load should sit on your hips, not your shoulders. If your shoulders are carrying the weight, go back to step two and adjust the torso length.
The real test is mile eight. If the hip belt has ridden up onto your waist, the torso length is too long. If your shoulders are sore and the belt is fine, the torso length is too short. Adjust, walk again, and repeat until it's right. It takes twenty minutes and it's the difference between a miserable hike and a great one.
The competition and why it lost
The packs above aren't the only options, and I want to be clear about why the obvious alternatives lost. Frameless ultralight packs, the kind that dominate the lightweight crowd, are great if your base weight is under 15 pounds. Above that, the frameless design punishes you, and most weekend hikers carry more. These two packs have frames, and that's why they made the list.
Big expedition packs, the 70 liter monsters, lose for a different reason. They're built for weeks on trail, and they carry the weight of their own construction. If you're doing weekend trips, a 50 liter pack is the ceiling. Anything bigger is dead weight.
The premium brands make excellent packs. I've hiked thousands of miles on them. But they cost two to three times as much as these budget options, and for a hiker who's just getting started or who only gets out a few weekends a year, the budget pack with a correct fit beats the premium pack with a wrong one. Fit beats features, every time.
What this all costs
The Loowoko 50L and the Maelstrom 40L both sit at the budget end of the market. Check current Amazon price for each, and you'll find they're a fraction of what a premium pack costs. Over five years of weekend trips, the cost per day is pennies.
- Loowoko 50L: check current Amazon price. A multi-day pack with a rain cover, ready for three or four day trips.
- Maelstrom 40L: check current Amazon price. A lighter pack for day hikes and minimalist overnights.
The fitting is free. A measuring tape costs a few dollars if you don't have one, and any outdoor store will measure your torso for free if you ask. Twenty minutes of adjustment now saves eight miles of shoulder pain later.
That's the job. Your pack was built to transfer load to your hips. Let it. Measure your torso, set the hip belt on your iliac crest, and check where the weight sits at mile eight. Do that once, and every hike after it gets better.