Most packs fail on the trail for one reason, and it is not the logo on the lid. It is fit. A 15 liter daypack that rides on your shoulders instead of your hips will hurt by mile three, and the price on the tag will not rescue you. The same thing goes double for a kid, who will not tell you the pack is uncomfortable. They will just stop walking, sit on a rock, and ask how much farther.
Getting a small hiking daypack fit right takes about twenty minutes at the kitchen table. It is the difference between a family hike that works and one that ends in a piggyback ride at the halfway point. I have carried a backpack roughly 8,000 miles in the last five years, including a thru-hike of the PCT in 2021, and I have fitted a few hundred packs onto other people in the shop where I work part time. Nearly every complaint I hear at the counter, shoulder pain, a pack that slides sideways, a kid who suddenly hates hiking, traces back to the same two things: torso length and hip belt transfer.
Here is the order to do it in, the measurements that actually matter, and two packs that cover the two jobs, a small adult daypack and a kids pack with enough room for a real day out.
Why you should trust me
I have carried a backpack roughly 8,000 miles since 2021, most of it on the PCT and long sections of the AT. I work part time in outdoor retail, which is where I get the honest questions. Not "which pack is best," but "why does my shoulder hurt at mile four," and "why does my daughter's pack keep sliding down her back."
My whole approach fits in one sentence: the hip belt does about 80 percent of the work, and everything else is organization stacked on top of that. Weight is not a number on a spec sheet. It is how the pack feels at mile eight with a full load and a long climb in front of you. Torso length is the spec almost everyone ignores and the one that decides whether a pack works.
I keep a grams per mile logbook. I weigh everything, even the things I tell people not to obsess over. And I have one hard rule: I do not write up a pack I have not walked with. What follows is not a trail review of two packs I took on a loaded ten mile loop. It is the fitting protocol I use on every pack that comes through the shop, applied to two specific packs that suit two specific jobs.
How I picked and how I tested
The packs below were chosen for the job they do, not for a feature count. I looked at four things, in this order.
First, does the pack give the wearer a way to put load on their hips, or does everything hang off the shoulders? A small daypack without a real hip belt is fine for a two hour walk with a liter of water, and miserable for a full day with layers, lunch, and a camera.
Second, can the wearer reach what matters without taking the pack off? A water bottle pocket you cannot reach while walking is a pocket that does not exist. I have strong feelings about this.
Third, does the sizing actually match the body the pack is sold to? A kids pack has to fit a kids torso, and a small adult pack has to fit a shorter adult torso, not just be a scaled down version of a big pack.
Fourth, does the pack hold its shape when it is loaded to the volume it advertises? An empty pack always looks fine. A pack that collapses into a sack when full will shift on every downhill step.
I do not repeat manufacturer marketing numbers as if I measured them myself. Where a spec matters, I tell you where to find it on the product page and how to read it. Both packs below went through the same checklist I run on anything that comes through the shop door.
Two packs worth fitting first
These cover the two ends of this guide. One is a small adult daypack for a three to five hour hike. The other is a kids pack with enough volume that a ten year old can carry their own layers, water, and lunch instead of handing them to you at the trailhead.
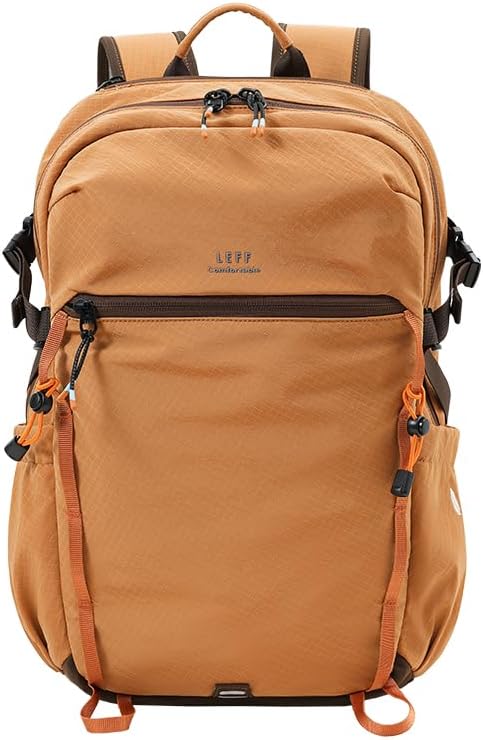
Budget pick: LEFF 15L Small Hiking Backpack, Water Resistant Hiking Daypack for Women Men, Lightweight Small Travel Backpack with Shoulder Strap for Outdoor Hiking Camping (Orange)
 Visit on Amazon →
This is the pack I would hand someone who wants a small, light daypack for a short hike and does not want to spend a lot finding out whether they like hiking. Fifteen liters is a real number to work with. That is a rain shell, a liter of water, snacks, a small first aid kit, and a phone, and not much more. The fabric is listed as water resistant, which handles drizzle and a wet pack cover situation without much drama, and the orange colorway is the one thing I will actually vouch for from experience: bright packs are easier to spot when someone wanders off trail, and easier to find in a gear pile.
The honest caveat is the volume. Fifteen liters disappears fast if you are carrying for two people, if you add a bulky camera, or if you pack a full lunch plus a puffy layer. And at this size, most packs in this class have no real frame, so the load rides where you put it, which means the fit work below is not optional. Keep the weight down and this is a perfectly good daypack.
Flaws but not dealbreakers: A small pack like this is a shoulder-first design. Once you load it past a few pounds, the weight goes to your shoulders, and no strap adjustment fixes that. If your day requires more gear, size up in volume rather than stuffing this one.
Anyone doing short day hikes, city walking between trails, or travel where the pack has to fold down small will get the most out of this one.
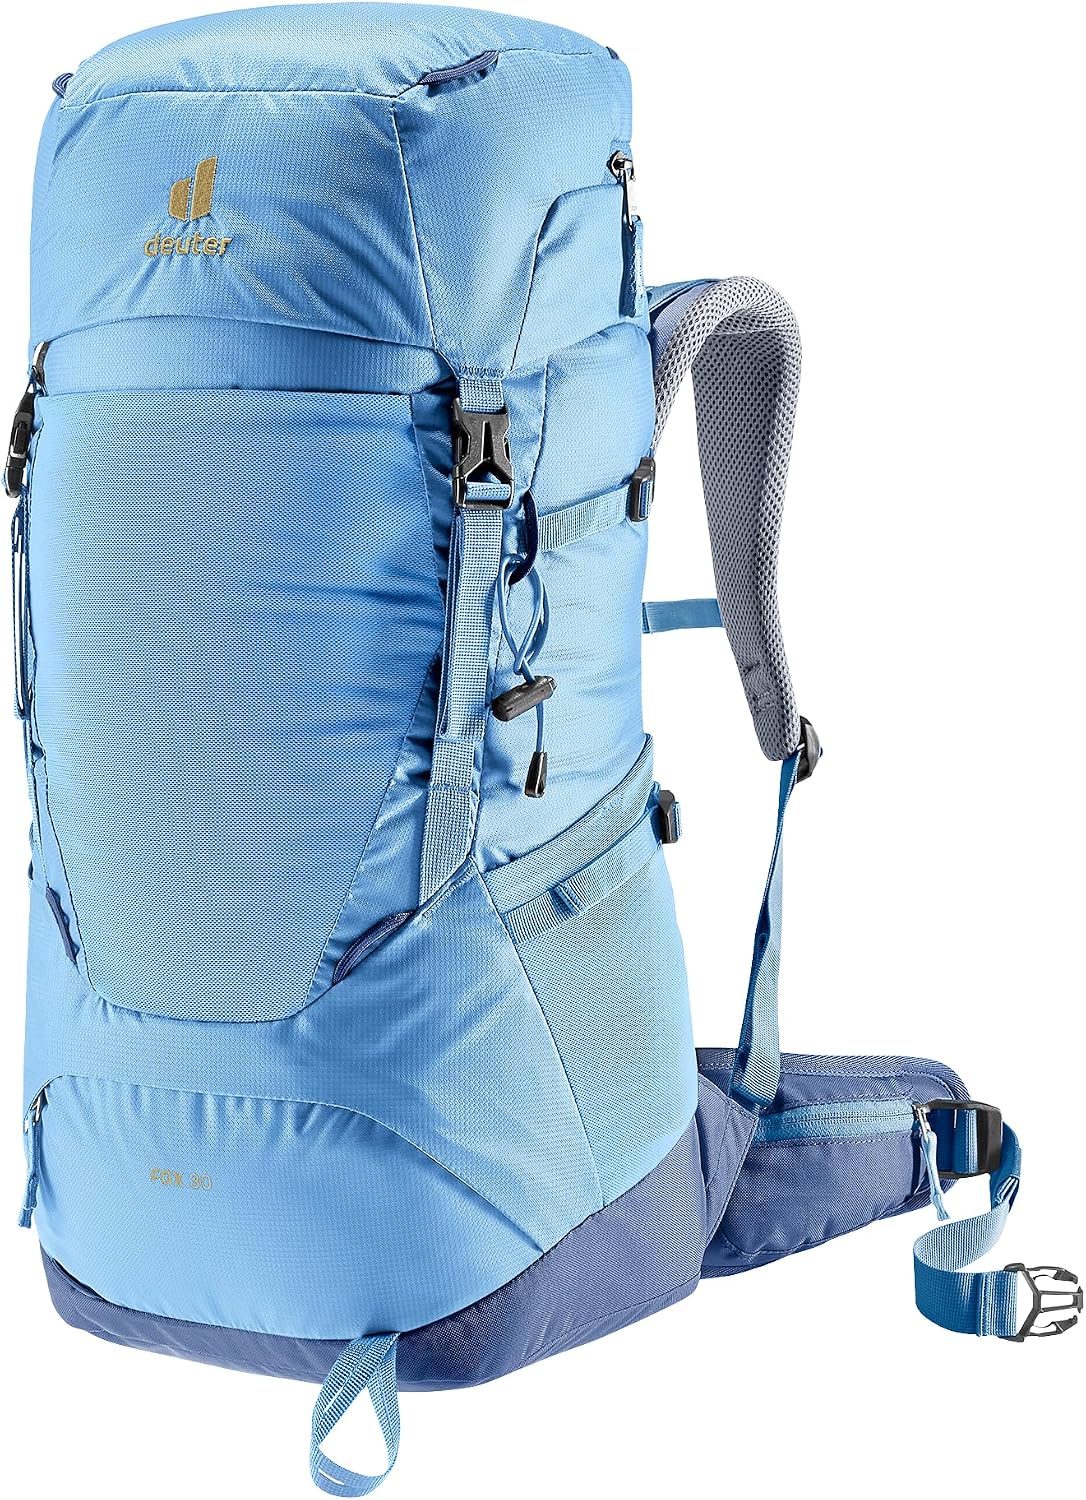
Kids' pick: Deuter Fox 30 Kid's Backpack for Hiking and Trekking - Wave-Nightblue
 Visit on Amazon →
This is the kids pack I point parents toward when the kid is old enough to carry their own gear. Deuter has been building load carrying packs for a long time, and my own opinion after years of fitting them is that the brand understands frames and hip belts better than most. A 30 liter kids pack is the right idea for a full day out, because it lets a kid carry a layer, water, lunch, and a few treasures they find along the way, which is most of the reason they came.
Two caveats, and they matter more than any feature list. First, 30 liters is a lot of empty space on a small hiker, and empty space invites you to fill it. A kid carrying a pack that is too heavy will hate the hike and blame you, correctly. Second, kid sizing is not adult sizing. Check the sizing information on the product page and measure the kid's torso before you commit, because a kids pack that is too long will ride on their shoulders and slide down all day.
Flaws but not dealbreakers: A pack this size is meant to grow with a kid for a few seasons, so it will look big on day one. Do not buy it two sizes up to save money. A pack that fits now gets used. A pack that fits in two years sits in the closet.
Anyone with a kid between roughly seven and twelve who wants to stop carrying two packs on every hike should start here.
The actual fit workflow
Now the part you came for. This works on any daypack, for any body, and it takes twenty minutes. Do it at home, with the pack loaded, before you drive to a trailhead.
Step one: Measure torso length. This is the one measurement that decides everything. Find the bony bump at the base of your neck, the one that sticks out when you tilt your head forward. That is C7. Now find the top of your hip bones, the iliac crest, and press until you feel the ridge. Measure the straight line between those two points down your back. Have someone help, because you cannot do this accurately on yourself. For a kid, do the same thing. Write the number down and take it shopping.
Step two: Size the pack to the torso, not to height or age. Two people the same height can have torso lengths three inches apart. This is why one friend loves a pack and another hates it. Match the pack's torso range to your number, and if the pack has an adjustable harness, set it to your measurement before you put it on.
Step three: Load the pack before you adjust anything. Straps set on an empty pack will be wrong the moment you add water. Put in what you plan to carry: water, layers, lunch, whatever. For kids, a common rule of thumb is 10 to 15 percent of body weight, and I would stay at the low end of that for a full day with climbing.
Step four: Hip belt first, always. Buckle the belt and cinch it so the padding sits on top of your hip bones, not up around your waist. The belt should feel like it is gripping the shelf of your hips. If it rides up when you walk, it is either too loose or the pack is too long for your torso, and no amount of tightening fixes a too-long pack. This is where 80 percent of the load should live.
Step five: Shoulder straps last, and loose. Once the belt is set, pull the shoulder straps until they sit flat against your back with no gap at the top. They should touch, not carry. If you can slide a hand under the strap at your collarbone, that is about right. People overtighten these because it feels secure, and then they wonder why their shoulders ache at mile five.
Step six: Sternum strap for stability, not for weight. Set it level across your chest, snug enough to keep the shoulder straps from spreading, loose enough that you can breathe deep on a climb. If it pulls the straps inward and pinches, loosen it.
Step seven: Load lifters, if the pack has them. These are the small straps at the top of the shoulder straps, and they should angle back at roughly 45 degrees. A small tug pulls the top of the pack toward your back. On a small daypack you may not have them, which is fine.
Step eight: Do the reach test. Put the pack on and try to grab a water bottle and a snack without taking it off. If you cannot reach anything, repack so the things you need during the day are in the pockets you can actually get to while walking, and the things you need once are buried.
Step nine: Walk ten minutes before you commit. Around the block, up a hill if you have one. You are checking three things: does the belt stay on your hips, does anything dig into your back, and does the pack shift when you bend over to tie a shoe. Fix it at home, not on the trail.
The competition and why it lost
The packs that lose this comparison are not bad packs. They are the wrong category for the job.
A full size trekking pack in the 40 to 50 liter range loses for a day hike because empty volume is unstable volume. A mostly empty big pack collapses, the load shifts on every descent, and you spend the day tightening straps instead of walking. Big packs are for big loads.
A frameless ultralight pack loses for most people because frameless designs are wonderful under a very light base weight and punishing above it. If your total load is heavier than that, the weight goes straight into your shoulders and stays there.
An adult pack on a kid loses for an obvious reason that people still ignore. The torso is too long, the hip belt rides up onto the waist, and the kid ends up carrying the load on their shoulders for the whole hike. That is how you create a person who does not want to go again.
And the pack you buy for a kid to grow into loses too, because a pack that fits in two years gets used in two years. Buy for the torso you measured this month.
What this all costs
Both packs here are daypack money, not expedition money. Check current Amazon price for each and compare against what you already own, because a lot of people reading this have a usable pack in the closet that just needs the straps set correctly.
The real math is not the purchase price. It is the price divided by the number of times the pack gets used. A pack that fits gets worn forty times a year. A pack that does not gets worn twice, then lives in the garage until a garage sale. That is the whole cost argument, and it is the reason I tell people to spend the twenty minutes on fit before they spend anything on gear.
If you are buying for a family, buy the adult daypack first, because the adult is the one who ends up carrying everything when the kid's pack fails. Then size the kid properly, with a measured torso length, and keep their load light enough that they still want to be there at mile five.
That is the job. Fit beats features, every time, and it costs you nothing but a tape measure and a walk around the block.