Most people buy a hiking backpack the way they buy a jacket: they pick the size that matches their height, hope for the best, and find out on the trail. That is backwards. Hiking backpack fit comes down to one measurement almost nobody takes, and one tightening order almost nobody teaches.
I have carried a backpack roughly 8,000 miles in the last five years. I thru-hiked the PCT in 2021, section-hiked chunks of the AT, and I still work a few shifts a month in outdoor retail, mostly because the gear discount is good and the customer questions are better. The trail tells you in the first mile whether a pack fits. Not the spec sheet, not the showroom walk, not the review you read at midnight.
This guide is the fitting and loading routine I use at the shop counter with a tape measure in hand. The two packs below fit two different sizes of trip and two different budgets, and I will be honest about what I can and cannot tell you about each one.
Why you should trust me
I keep a grams-per-mile logbook. Every pack that comes through my hands gets the same three checks: a loaded 10-mile hike, a hip belt transfer check where I watch how much weight actually leaves the shoulders, and a 30-day daily carry trial.
That routine is why my boundaries are what they are. I do not write a verdict on a pack I have not carried loaded, and I do not call anything ultralight that I have not put on my own scale. What I can do here is tell you which trips a pack is built for, what the spec sheet does and does not tell you, and how to fit the thing once it shows up at your door.
The framework is simple. Fit beats features, every time. A $400 pack that does not match your torso is worse than a $100 pack that does. The hip belt does about 80% of the work of carrying a load, and everything else, the pockets, the lid, the compression straps, is organization stacked on top of that one job.
How I judged the two packs in this guide
Both packs here sit at the accessible end of the market, which is exactly where most first and second packs should start. Neither one is a pack I have put a loaded 10-mile verdict on, and I am not going to pretend otherwise. What I can do is read the architecture: frame type, volume, closure, whether a rain cover is included, what the harness looks like.
The two numbers I care about most are torso range and stated volume. A 65-liter internal frame pack and a 45-liter tactical pack are not competing for the same trip. One is a multi-day shelter-and-sleep-system hauler. The other is a three-day bag, a travel bag, or a big daypack for someone who carries more than a hydration bladder and a sandwich.
Fit is the thing I cannot check for you from here. That part you do with a tape measure, and I walk you through it below. What I can tell you is where each pack belongs and what to verify before you commit.
Two packs worth fitting
The pairing here is deliberate. One is built around an internal frame for multi-day loads. The other is a large-volume tactical-style pack that doubles as a travel and day bag. Different jobs, different harnesses, different loads.
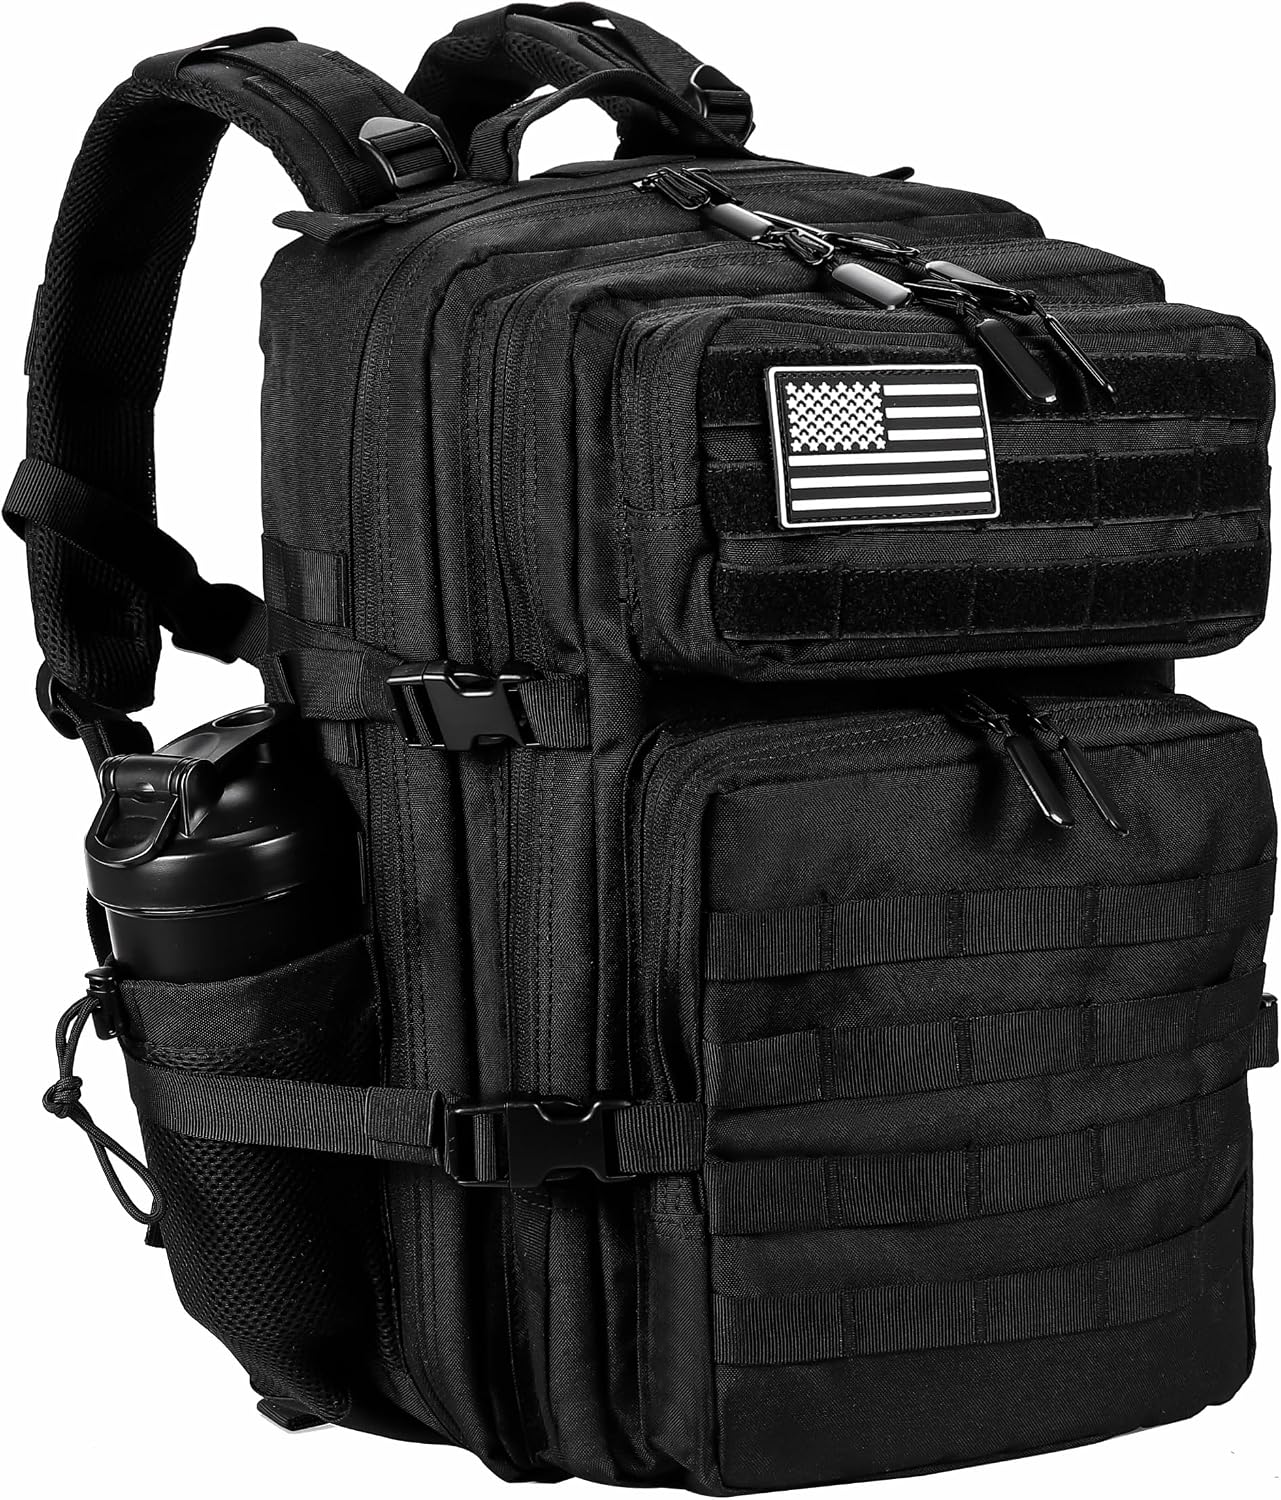
Budget pick: LHI Military Tactical Backpack for Men and Women 45L Army 3 Days Assault Pack Bag Large Rucksack with Molle System Black
 Visit on Amazon →
Check current Amazon price. That is the first thing to know about this one, because the money is the argument. A 45-liter pack with MOLLE webbing across the body is a lot of carrying capacity for what this costs, and it is the pack I would point a customer toward for a three-day trip, a carry-on, or a range and gym bag that occasionally ends up on dirt.
MOLLE is the honest feature here. It is a grid of webbing that lets you lash pouches on the outside instead of stuffing everything inside. That matters when you are carrying a hydration setup, a first aid kit, or tools you want outside the main compartment. It also matters in the other direction: webbing adds weight and snags on brush, and an overloaded MOLLE panel is the fastest way to turn a balanced pack into a swinging pendulum.
Before you commit, verify three things. Does the torso adjust at all, or is it a fixed-size harness? Is the hip belt a load-bearing belt with real padding, or a stabilizer strap that just keeps the pack from sliding? And is the volume actually usable, meaning the main compartment is deep enough for a sleeping bag and a pad rather than just wide on paper?
Who it is for: someone whose trips run one to three days, someone who wants one bag that works on a plane and on a trail, and anyone who needs volume without spending specialty-brand money. If you are going out for a week with a full sleep system and food, keep reading.
Flaws but not dealbreakers: Tactical styling is a look, and on a legit hiking trail that look draws attention. It is also not a suspension system. Treat the 45 liters as a bag you carry, not a frame that carries you.
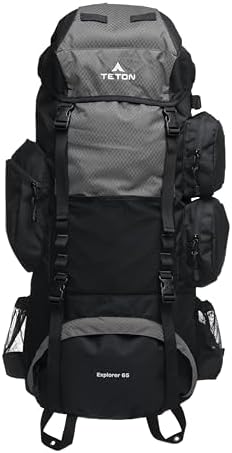
Our pick: Teton 65L Explorer Internal Frame Backpack for Hiking, Camping, Backpacking, Rain Cover Included, Graphite
 Visit on Amazon →
Check current Amazon price. This is the pack in this guide built for the trip where you carry everything: shelter, sleep system, stove, food, water, and the layers you peel off at noon. An internal frame is the right architecture for that, because it is what stands between your shoulders and the load. Volume alone does not transfer weight. Frame and hip belt do.
Sixty-five liters is the classic multi-day number. It is enough for a three to five day trip with a normal kit, and it is forgiving if your gear is not dialed in yet. If your base weight is under 15 pounds, this is more pack than you need, and a frameless ultralight pack would serve you better. Above that, you want a frame, and this is one.
The included rain cover is not a throwaway detail. Rain covers are the piece of kit people leave at home and regret. That said, a rain cover is only useful if it fits the loaded pack and not just the empty one, so test it once at home with everything packed before you trust it in weather. That is also where I see most covers fail, overstuffed and straining at the seams while the bottom of the pack wicks water.
Before you commit, check the torso adjustment range against the measurement you take in the next section, and check the hip belt padding. Graphite is a smart color for a pack that gets thrown in truck beds and set down on wet granite.
Flaws but not dealbreakers: A 65-liter pack encourages overpacking, and an overpacked pack defeats its own suspension. Weigh your kit before your first trip and leave the extras at home.
How to fit a hiking backpack, step by step
You need a soft tape measure, or a piece of string and a ruler. Ten minutes, done once, and it applies to every pack you buy for the next decade.
Step one: Measure your torso. Tilt your head forward and find the bony bump at the base of your neck, the one that sticks out when you nod. That is C7. Now find the top of your hip bones, the iliac crest, by pressing your hands into your sides until you feel the ridge. Measure the straight line between those two points. Not your height. Not your shirt size. That number.
Step two: Buy the size that matches the torso, not the height. This is the spec everyone ignores and the one that matters most. Two people the same height can be four inches apart in torso length, and they need different pack sizes.
Step three: Load the pack before you adjust anything. A pack fitted empty lies to you. Put in the weight you actually plan to carry, water included, then start the harness sequence.
Step four: Hip belt first. Center the padding over the iliac crest, not on your waist and not on your stomach. Buckle it and tighten until the padding wraps your hips and the belt is carrying weight. If the belt rides up onto your waist as you walk, it is either too high or too loose, and that is the number one complaint I hear at the counter.
Step five: Shoulder straps second. With the belt set, snug the shoulder straps. They should curve over your shoulders and come down at a slight angle. If they are carrying visible weight, the belt is not doing its job.
Step six: Load lifters third. These are the small straps at the top of the shoulder straps. Tighten them until the top of the pack pulls in toward your back without lifting the shoulder straps off your shoulders. Then back off a touch.
Step seven: Sternum strap last. Level across the chest, snug enough to hold the straps in place, loose enough that you can take a full breath. It is a stabilizer, not a load-bearing strap, so do not crank it.
Step eight: Walk ten minutes, then retighten. Load settles. Straps stretch. Check the belt again at the end of the first mile, then leave it alone.
How to load it so the weight stays on your hips
A pack that is fitted right can still carry terribly if it is packed wrong, because packing sets where the center of gravity sits.
Put the heaviest items in the middle of the pack, close to your spine, roughly between your shoulder blades. Food, water, stove, and the heavy stuff goes there. Your sleeping bag and anything light goes at the bottom. Your puffy layer goes on top of the load or in the lid where you can grab it without unpacking.
Anything you need while walking goes where you can reach it without stopping: water bottle in a side pocket, snacks in a hip belt pocket. A pocket you have to take the pack off to reach is a pocket that does not exist. That includes the hip belt pockets, which is where I put my map and my bars.
Compression straps go from the bottom up, snugging the load toward your back rather than strangling the middle of the pack. Tighten the top strap, then work down. This keeps the load from sagging into the small of your back.
Rain cover goes on before the weather arrives, not after, and it goes on over the loaded pack. Same logic for a 45-liter tactical bag as for a 65-liter hauler, though a MOLLE panel means more straps to check and more places for water to sit.
One more thing: do not push a pack past what its frame and belt are designed to carry. A 45-liter bag loaded to 40 pounds will hurt no matter how well you fit it, and so will a 65-liter loaded to 55.
The packs that did not make this guide
Frameless ultralight packs are wonderful and they are not in this article for a reason. Under a 15-pound base weight they float. Above it, the frameless design punishes you, and the whole point of this guide is a pack that carries a load.
Twenty to thirty liter daypacks did not make it either. They are the right answer for an afternoon hike, but you cannot fit a sleep system in one, so they belong in a different piece.
External frame packs and wheeled travel duffels are their own categories, and they solve problems this guide is not about. Neither is a bad choice. Neither is the tool for a multi-day carry where the hip belt is doing the work.
What this all costs
Check current Amazon price on both packs, then do the math on cost per mile rather than cost per trip. A pack you carry for five years of weekend trips costs less per outing than a cheap pack you replace twice because the belt never fit and you blamed your shoulders.
The fitting itself is free. Ten minutes with a tape measure and a friend who can read a number off your back. The loading order costs nothing. What it buys you is the difference between a pack that hurts at mile 8 and one you forget you are wearing.
Do the torso measurement tonight. It is the single thing standing between you and a pack that actually carries the load. Your shoulders will tell you within the first mile whether you got it right.