How To Pack A Backpack For Multi Day Hiking
Related: Best Backpacking Backpack: Multi-Day Loads, Done Right
The internet is full of packing lists that assume you own a 65-liter behemoth and a kitchen sink. But what if you're working with a 40-liter pack that needs to do double duty for a weekend on the trail and a flight to visit your sister? I've been carrying packs for roughly 8,000 miles over the last five years, including a PCT thru-hike, and I've learned that how you pack matters more than what you buy.
I've also learned that most advice ignores the reality of the packs most of us actually own: the budget-to-mid-range workhorses that need a little strategy to shine.
This isn't a guide for ultralight gram-counters. It's for the rest of us, the ones who want to carry 25 pounds without our shoulders staging a mutiny by mile eight.
The Foundation: Weight Belongs On Your Hips, Not Your Shoulders
Before you stuff a single item, you need to understand the physics. Your hip belt is the engine of your pack. The shoulder straps are just there to keep the pack from falling off. If your pack doesn't have a decent hip belt, or if it's not adjusted correctly, you're fighting a losing battle.
I see it all the time at the shop where I work part-time. A customer comes in with a pack that's technically fine, but they've got the hip belt cinched too low, sitting on their hip bones instead of wrapping the iliac crest. Or they've got it too loose, so all the weight drops onto their shoulders. By mile three, they're miserable.
The fix is simple. Load your pack, put it on, and bend forward slightly. The hip belt should sit snugly over your hip bones, not your waist. Cinch it down so the pack's weight transfers to your pelvis.
Then, and only then, tighten the shoulder straps enough to keep the pack close to your back. The load lifter straps, the little ones that angle up from the shoulder straps to the top of the frame, should pull the pack into the curve of your back.
If you do this right, you should feel maybe 20 percent of the weight on your shoulders. The rest goes to your hips.
The Heavy Stuff Goes Low and Close
Here's the part that surprises people. You want the heaviest items, your water, your stove, your bear canister if you're in the Sierra, packed low and close to your spine. This keeps your center of gravity stable. A pack with a high, heavy load feels tippy on uneven terrain. It makes you work harder to stay upright.
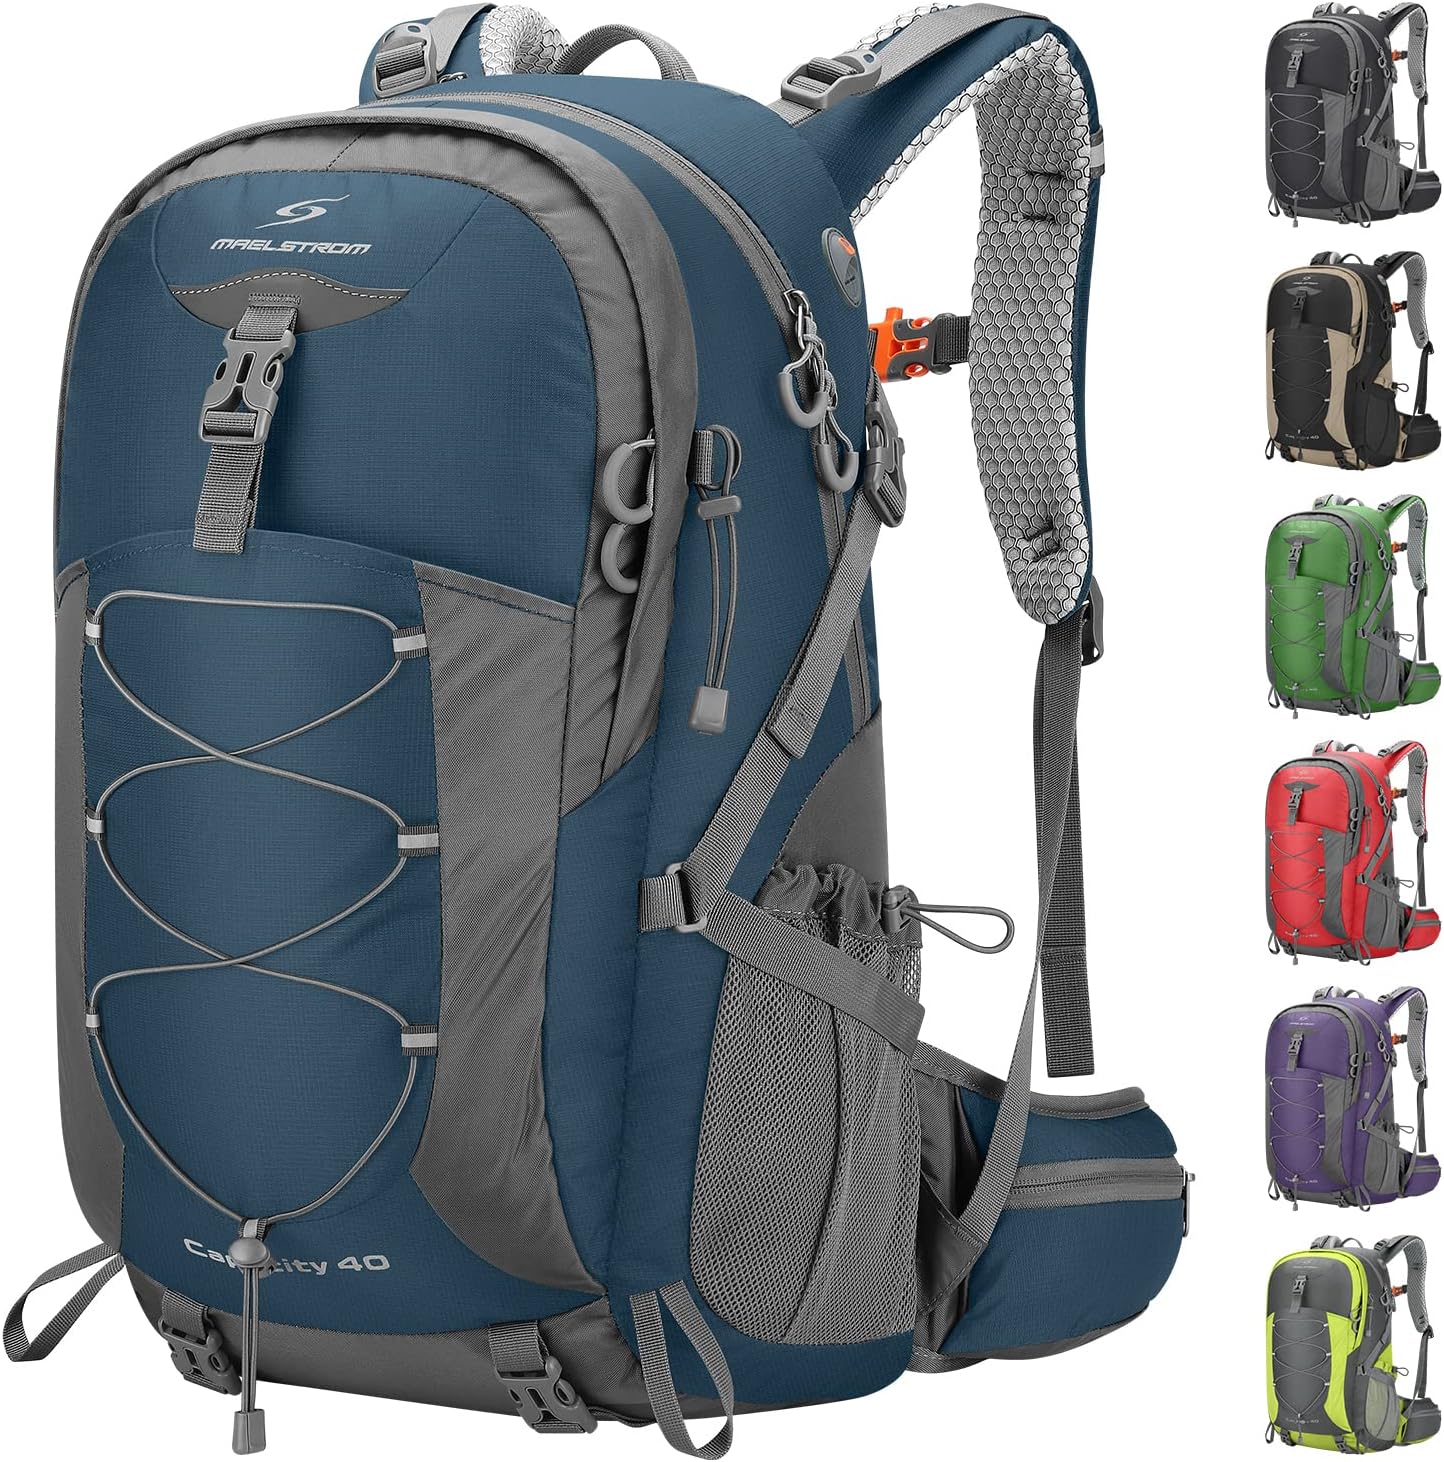
I'm a big fan of packs with deep side pockets for this reason. The Maelstrom 40L has side pockets that are deep enough to swallow a heavy Nalgene bottle without it launching itself out when you bend over. I've watched a 32-ounce bottle bounce off a rock because a shallower pocket gave up on me. That's not a fun hike back.
For the main compartment, I put my sleeping bag at the very bottom, in a compression sack if I have one. Then my stove, fuel, and food bag go in next, sitting in the curve of the pack against my back. My tent goes on top, or strapped to the outside if it's a two-person model. The goal is a pack that feels like a solid block, not a sack of laundry with a hard lump in the middle.
The 10-Mile Rule and Your Gear's "Just in Case" Problem
My rule of thumb is the 10-mile rule. If a pack is comfortable at 10 miles, it'll be comfortable at 20. If it hurts at 10, it will only get worse. This applies to your packing strategy too. If you're second-guessing an item's weight at mile two, you're going to hate it at mile ten.
The biggest culprit is the "just in case" gear. I'm guilty of it. I pack an extra base layer "just in case" it gets cold, and a paperback "just in case" I have time to read. Then I end up carrying two pounds of stuff I never touch. On my PCT thru-hike, I sent home a ridiculous amount of "just in case" gear in the first week. It's a learning curve, but you can skip it by being honest with yourself.
The version I own of the Teton Oasis, which I've had for over two years now, has a ton of pockets. It's easy to stuff things into every nook and cranny, which is great for organization but dangerous for weight creep. I've learned to use the pockets for specific things, not just as a void to fill.
The Zipper Tax and the Bottom Line on Budget Packs
I need to be honest about the packs I'm referencing, because they represent two different philosophies. The Maelstrom 40L is under ~$60. It's a great value, with a hip belt that actually transfers weight and a rain fly included. I've carried 25 pounds in it through all four Disney parks, and my shoulders didn't quit. That's a real test, one I don't recommend replicating without a solid belt.
But the zippers. After a few years of hard-core miles, they start acting up. They catch fabric. They stick. It's the pattern I see in the owner reviews, and it's the pattern I've seen in my own testing.
The pack is great for the price, but the zippers are its known fatal flaw. Don't buy it expecting it to last a decade.
Buy it expecting a solid three to five years of regular use, and be gentle with the zippers.
The Teton Oasis, on the other hand, is the pack people buy twice. One owner had their first one stolen and bought the exact same model again. Their family tried it and now they own three. That's the highest compliment a pack can get.
The straps fit a 5'3", 135-pound reviewer properly, which is specific body-type data I trust. The bladder is solid, no leaks, good water flow.
But it has a plastic-y taste initially, and it's a pain to dry. It doesn't stand on its own, which is a small thing that becomes a big thing when you're trying to dry it in a hotel room.
Dish soap and two to three days of air drying is the known ritual.
The Versatility Factor
The best packs are the ones you reach for every day, not just on trail. I use my Teton for day hikes, gym sessions, and as a carry-on for short flights. It does all of those things well. A pack that only works on trail has to be exceptional on trail to justify its space in your closet.
The Maelstrom has hidden pockets that I discovered months after buying it. That's a genuine delight, but it's also confusing. The layout doesn't communicate its design well. If you're the type of person who likes to know exactly where everything is, a simpler pack might be better.
A full pack won't fit under an airplane seat, which is a travel constraint. If that's your primary use case, you need a smaller pack or you need to be okay with checking your bag. For a multi-day hike, though, 40 liters is the sweet spot for a three-season setup. It forces you to be efficient without being miserable.
Putting It All Together: A Sample Load
Let me walk you through a typical weekend load for a 40-liter pack, the kind I'd carry for a two-night trip in the spring or fall.
At the bottom, my 20-degree sleeping bag in a compression sack, about 3 pounds. Next, my tent, a two-person model that splits the poles between me and my partner, about 2.5 pounds. Then my stove, a small canister of fuel, and my food bag, which I keep to about 1.5 pounds per day. That goes in the main compartment, close to my back.
On top of that, my puffy jacket, a rain shell, and a beanie. In the lid pocket, my headlamp, a small first-aid kit, and my phone. In the hip belt pockets, my snacks and my camera. In the side pockets, a 32-ounce water bottle and my water filter.
That's roughly 20 pounds before water. With a liter of water on board, it's pushing 22. On my back, with the hip belt doing its job, it feels like a solid, manageable load. I can hike 10 miles without wanting to cry.
My Honest Bottom Line
Packing for a multi-day hike isn't about buying the most expensive gear. It's about understanding how your pack works and being honest about what you actually need. Put the weight on your hips, keep the heavy stuff low and close, and be ruthless about the "just in case" items.
If you do that, even a budget pack like the Maelstrom 40L or the Teton Oasis, which I've owned for two years and still trust, will carry you further than you think.
I've learned more from the packs that failed than the ones that succeeded, and the main lesson is this: fit and packing strategy beat a fancy logo every single time.