Most people buy one backpack and ask it to do two jobs. A lightweight hiking daypack and a commuter laptop pack look nearly identical on the shelf: both around 20 liters, both with two shoulder straps and a grab handle, both in black. Then you carry the wrong one up a switchback and the straps dig into your collarbone by mile six, or you walk into a meeting with a hip belt flapping at your waist.
I have carried a backpack roughly 8,000 miles in the last five years, most of it on the Pacific Crest Trail and sections of the Appalachian Trail, and I still watch the same mistake play out in the store every weekend: someone buys liters and colors instead of fit and purpose.
Here is the thing. The pack matters less than the fit, and the fit matters less than picking the right category of pack for the day you are actually having. A 20-liter hiking daypack and a 20-liter laptop pack are not interchangeable, even when they weigh the same and cost the same.
This guide walks through both: how to tell which one you need, how to measure your torso so either one fits, and how to load and adjust it so mile eight feels like mile one. It is a 20-minute job that almost nobody does.
Why you should trust me
I am June. I thru-hiked the PCT in 2021, I have section-hiked the AT, and I work part time in outdoor retail mostly for the gear discount and the honest customer questions. Every pack I talk about here gets judged the same way I judge anything: a loaded 10-mile hike, a hip belt transfer check, and a 30-day daily carry trial. I keep a grams-per-mile logbook, which sounds obsessive until you realize it is the only honest way to compare packs across seasons.
My bias is simple. Fit beats features. A pack that fits you at $90 is worth more than a pack that does not at $400. The hip belt does about 80 percent of the work, and everything else is organization stacked on top of that.
How I judge a daypack
Three checks, in this order.
Torso length first. Not your height, not your shirt size. The measurement from C7, the bony bump at the base of your neck, to your iliac crest, the top of your hip bones. Get this wrong and no pack on the market will fit you, no matter what the spec sheet says. Most daypacks come in one or two torso sizes, so this number decides whether you are even in the right model.
Hip belt transfer second. Load the pack with 15 pounds, put it on, and tighten the hip belt first. Then loosen the shoulder straps all the way. If the pack slides down your back, the hip belt is not doing its job and your shoulders will be doing all of it by mile five. If it stays put, you found a pack.
Real weight third. The number on the tag is a starting point. What matters is how the pack feels at mile eight with a full load, which is why I do not trust a verdict I have not earned on a trail.
For the purposes of this guide, the two packs below cover the two categories you are choosing between: a hiking daypack and a daily carry laptop pack. Buy the one that matches your actual week.
Two packs that cover both jobs
You do not need both. You need to know which day you have more of. If your weekends are trails and your weekdays are a commute, that answer is closer than you think, and the honest move is to pick the pack for the job you do most.
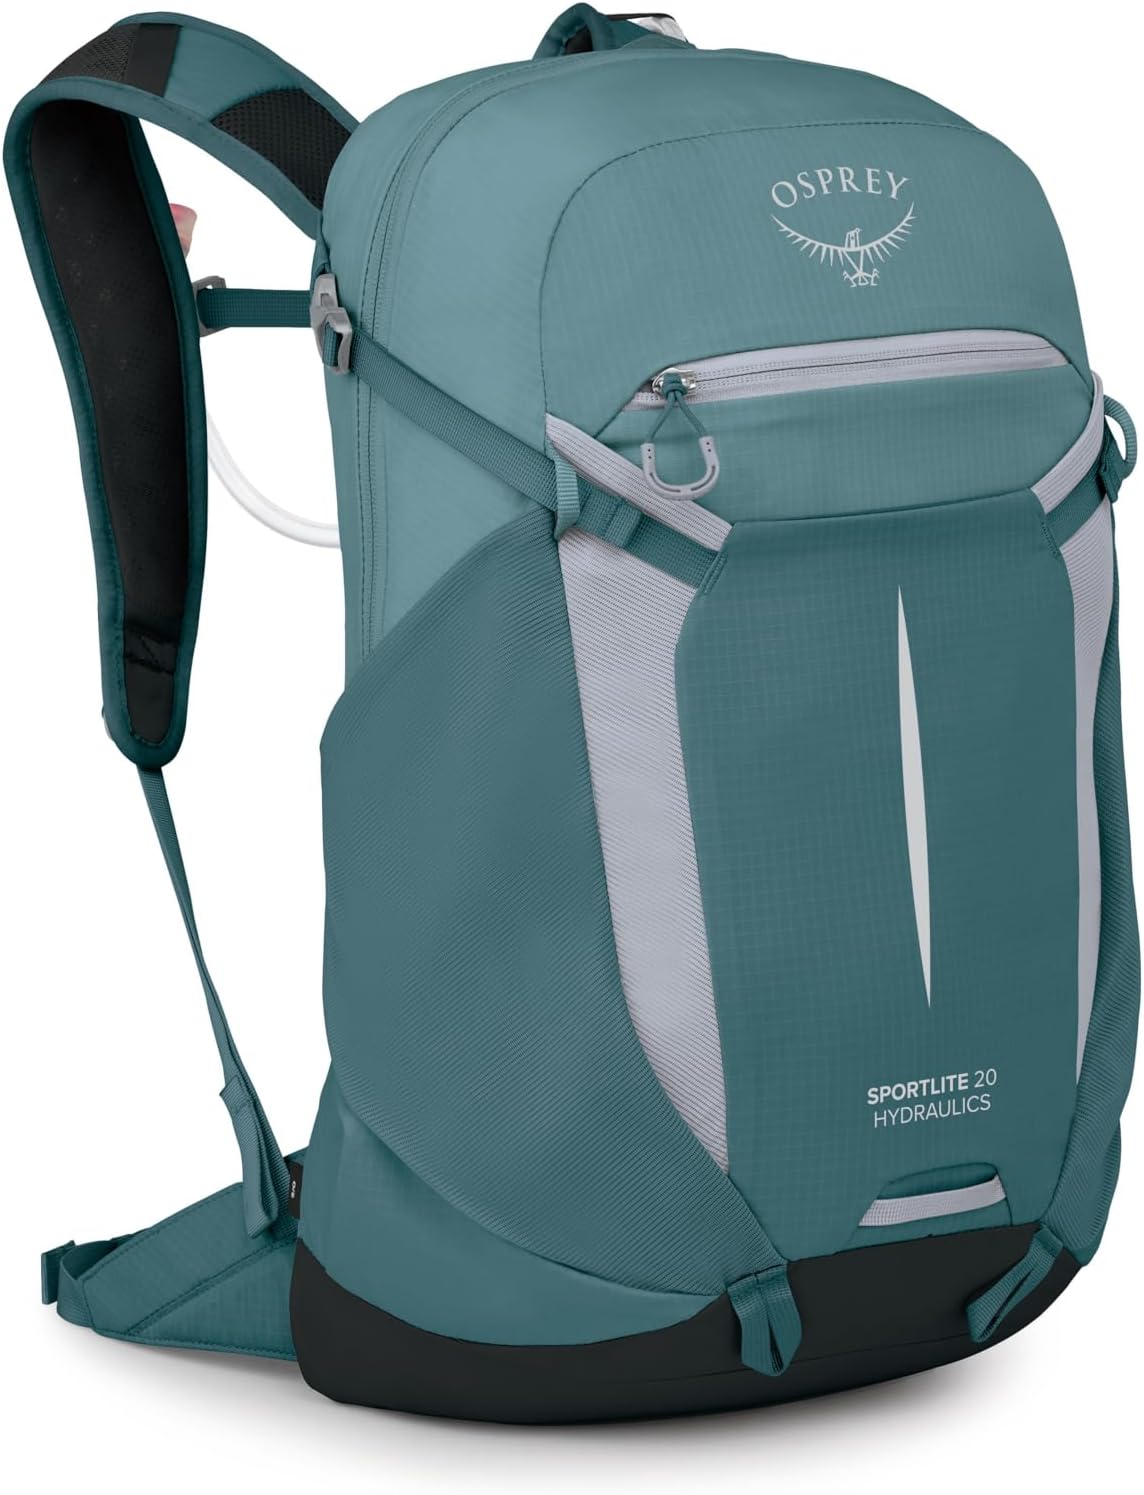
Trail pick: Osprey Sportlite 20L Lightweight Hiking Backpack, Tan OS
 Visit on Amazon →
Twenty liters is the sweet spot for a day out. It is enough for a shell, a fleece, two liters of water, lunch, a first aid kit, and a camera if you pack it flat, and it is not so much that you fill it with things you will never use. Osprey builds daypacks around a real harness, and this is the category where a harness actually earns its keep.
When you try it on, run the same check you would run on any pack. Hip belt centered on the iliac crest, snug but not strangling. Shoulder straps loosened, then tightened just until they touch your body. Load lifters angled up and forward, not straight back. If the pack sags onto your shoulders when you loosen the straps, the torso length is wrong for you and no amount of adjustment will save it.
The honest caveat: this is a hiking pack, so it organizes like one. Plan on using stuff sacks and pouches for small items instead of relying on a padded laptop sleeve, and if your day involves a 15-inch laptop and a change of clothes, this is the wrong shape of bag. It is also a 20-liter pack, which means it is a day pack, not an overnight pack. People who buy a 20 and expect a 40 are always disappointed, and it is never the pack's fault.
Flaws but not dealbreakers: The size range is the size range. If your torso lands outside what the harness adjusts to, you will feel it in your shoulders by mile three, and you should look at a different model rather than a different brand.
Anyone whose weekends are day hikes and whose weekdays do not involve a laptop should start here.
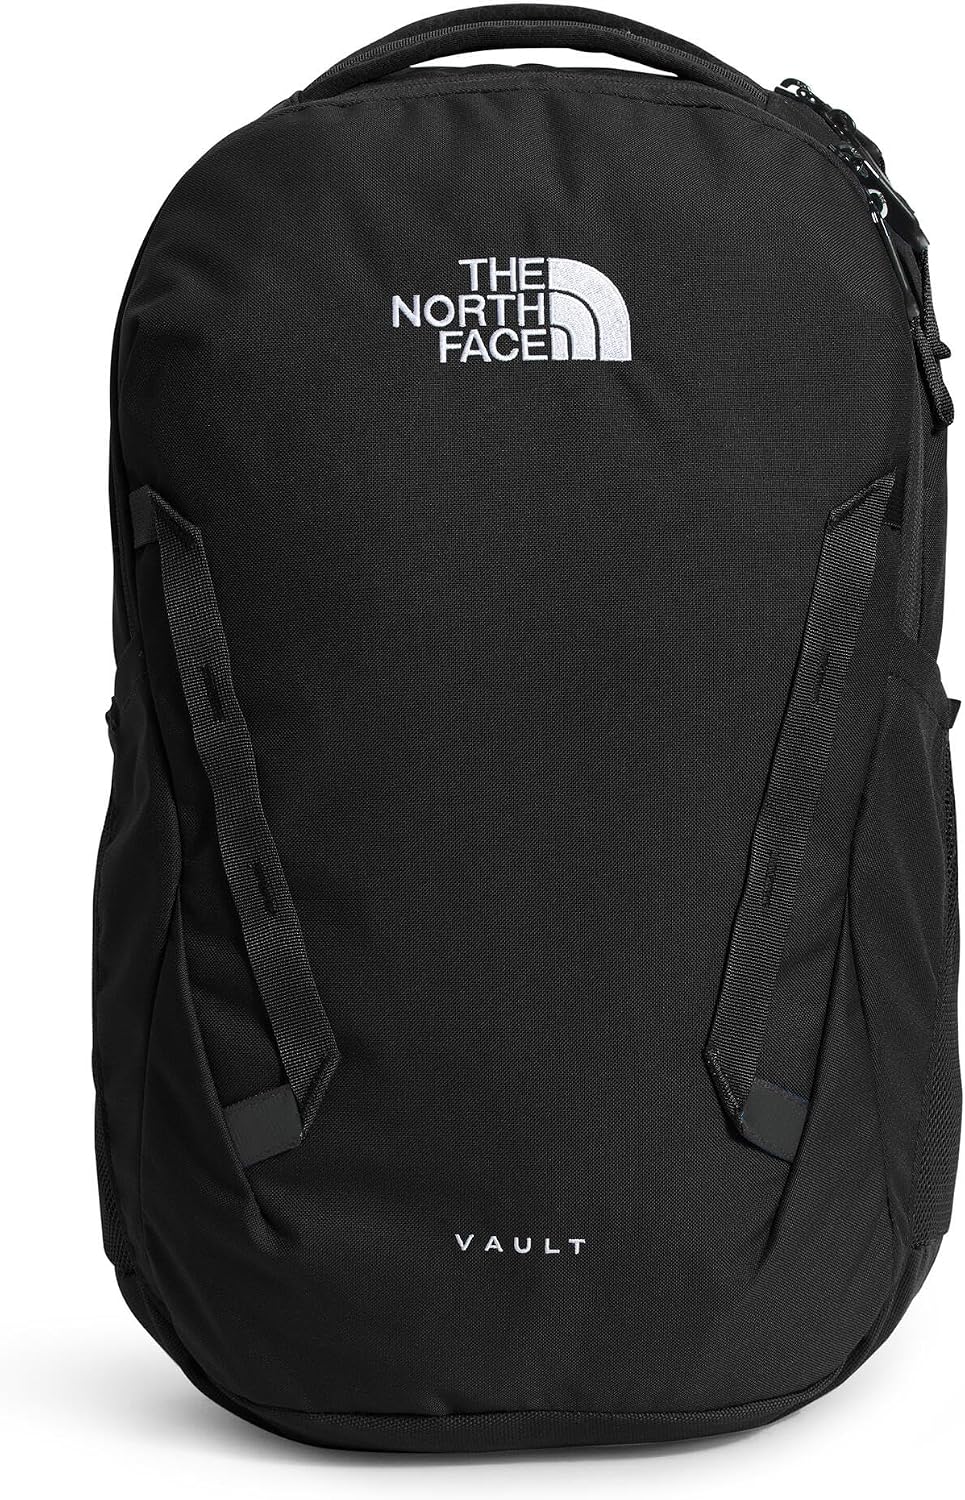
Daily carry pick: The North Face Vault Everyday Laptop Backpack, TNF Black-NPF, One Size
 Visit on Amazon →
The Vault is built around the commute: a padded laptop compartment, a main body for a change of clothes or a lunch, and a front pocket for the small stuff you actually reach for. That is the whole design brief, and it does it without pretending to be a trail pack. The laptop sleeve is the reason to buy it, and the organization is the reason you will keep using it after the commute stops being new.
Here is what it is not. It is a shoulder-strap pack, which means it has no load-transfer harness in the backpacking sense. That is completely fine for a laptop, a charger, and a water bottle. It stops being fine the moment you load 25 pounds into it for a hike, because all of that weight ends up on your shoulders and your neck. Commuter packs carry like a purse with two straps, and the good ones are honest about it.
The fit check is different for this category. Shoulder straps should sit flat against your chest without gaping at the collarbone, the sternum strap should sit across the middle of your chest and not your throat, and the bottom of the pack should land in the small of your back, not on your tailbone. If the pack rides low and slaps your lower back while you walk, shorten the straps.
Flaws but not dealbreakers: The organization is fixed. If you carry a camera body and a full day of layers, you will run out of room long before you run out of strap, and you should be looking at the hiking pack instead.
Anyone with a commute, a class schedule, or a laptop and a gym bag problem should start here.
The actual workflow: fit and load the pack you own
This works on either pack, and it takes about 20 minutes. Do it once and you will never guess again.
Step one: measure your torso. Tilt your head forward and find the bony bump at the base of your neck. That is C7. Now find the top of your hip bones on both sides and imagine a line between them. Measure straight down your spine from C7 to that line. Write the number down. This is the single spec that decides whether a pack fits, and it is the one nobody knows about themselves.
Step two: match the number to the harness. Daypacks usually come in one or two torso sizes with a few inches of adjustment. If you measure 19 inches and the pack tops out at 17, you are not "between sizes," you are in the wrong pack. Return it and size up.
Step three: set the hip belt first. Put the pack on with everything loose. Center the hip belt pads on your iliac crest, not your waist, and tighten it until it is firm. This is the step people skip, and it is the one that decides whether you are carrying the load or dragging it.
Step four: then tighten the shoulder straps. With the hip belt locked, pull the shoulder straps until they rest against your body without compressing your chest. If you tighten shoulders first and hips second, you have built a backpack that hangs from your collarbones, which is the classic mile-eight shoulder ache.
Step five: adjust the load lifters. Those small straps at the top of the shoulder straps should angle up and forward toward your shoulders at roughly 45 degrees. If they are flat or pointing backward, they are not lifting anything. A small tweak here moves several pounds off your shoulders.
Step six: snug the sternum strap. It goes across the middle of your chest, high enough that it does not restrict breathing. Tight enough to stop the straps from sliding outward, not tight enough to squeeze. If you feel it in your throat, it is too high.
Step seven: load it correctly. Heavy items go in the middle of the pack, against your back, at shoulder-blade height. That is where the weight transfers to your hips most efficiently. Sleeping bag or bulky layers go at the bottom. Things you need while walking go in hip belt pockets or a side pocket you can reach without stopping. A top-heavy pack pitches you forward; a bottom-heavy pack pulls you backward. Middle is the answer.
Step eight: walk a mile and check the pressure points. Put 15 pounds in it and walk. At the end, feel your shoulders, your hips, and your collarbone. Red marks on the shoulders mean the hip belt is not carrying enough. Red marks on the hips mean the belt is too high or too tight. Nothing at all means you did the job right.
For a commuter pack, the workflow collapses to steps four, six, and seven, plus one rule: keep the load under about 15 pounds. Above that, no commuter pack is comfortable, because there is nothing on it designed to move weight to your hips.
Where people go wrong
Buying liters instead of fit. A 20-liter pack that fits beats a 30-liter pack that does not, every single time. Volume is the easiest number to compare and the least important one.
Wearing the hip belt on the waist. The belt belongs on the iliac crest, the top of the hip bones, where it can lock. On the soft part of your waist it will ride up all day and you will spend the whole hike tugging it down.
Loading the pack top-heavy. The heaviest item belongs in the middle, against your spine. Get this wrong and your shoulders and lower back will tell you about it within an hour.
Taking a commuter pack on a real hike. It works for a flat two-mile walk. It does not work for a 10-mile day with layers and water, because there is no hip belt doing any of the work.
Judging a pack in the store. Ten minutes on a showroom floor with no weight in the pack tells you almost nothing. Load it, wear it around the block, and if the store will not let you, buy from somewhere that will.
What this all costs
Both packs here sit in the affordable end of the market, and neither one is a compromise you will regret. The real cost math is not the sticker. It is the number of days you carry the pack divided into what you paid for it. Carry a daypack twice a week for two years and you are talking about pennies per outing, which is the cheapest gear decision in the outdoor world.
What actually costs you money is buying the wrong category, hating it, and buying again. That is how people end up with four packs and none of them fit. Measure your torso, decide whether your week is mostly trail or mostly commute, buy one pack, and then spend the 20 minutes to set it up properly.
The pack does not have to be expensive. It has to fit, and it has to match the day you are actually having. Do the measurement, set the hip belt, load the middle heavy, and walk a mile to confirm it. That is the whole job, and it is the difference between a pack you tolerate and a pack you forget you are wearing.